← Help Center

Use the virtual microphone on Windows

Speak your own language and let everyone in Zoom, Teams or Google Meet hear the translation. You set it up once, and it takes about two minutes.

💻
This guide is for the MirrorCaption desktop app on Windows — get it from Downloads. The browser version cannot add a microphone to your computer. On a Mac the same panel needs no driver: press Activate and pick the microphone it names.

How it works

MirrorCaption listens to you through your real microphone, translates what you say and speaks the translation into a virtual microphone called CABLE Output. Your meeting listens to that virtual microphone, so the other side hears the translation instead of your own voice.

  1. You speak
  2. Your real microphone
  3. MirrorCaption translates and speaks
  4. CABLE Output, the virtual microphone
  5. Zoom, Teams or Google Meet
  6. Everyone hears the translation

The two microphones to pick

WhereMicrophone to pick
Inside MirrorCaptionYour real microphone — the headset or laptop microphone you talk into
In the meetingCABLE Output — the virtual microphone

Set it up

Step 1 — Keep your real microphone in MirrorCaption

In the control bar, open the Microphone dropdown and pick the microphone you actually talk into. The level bar moves while you speak. This stays the same for every call.
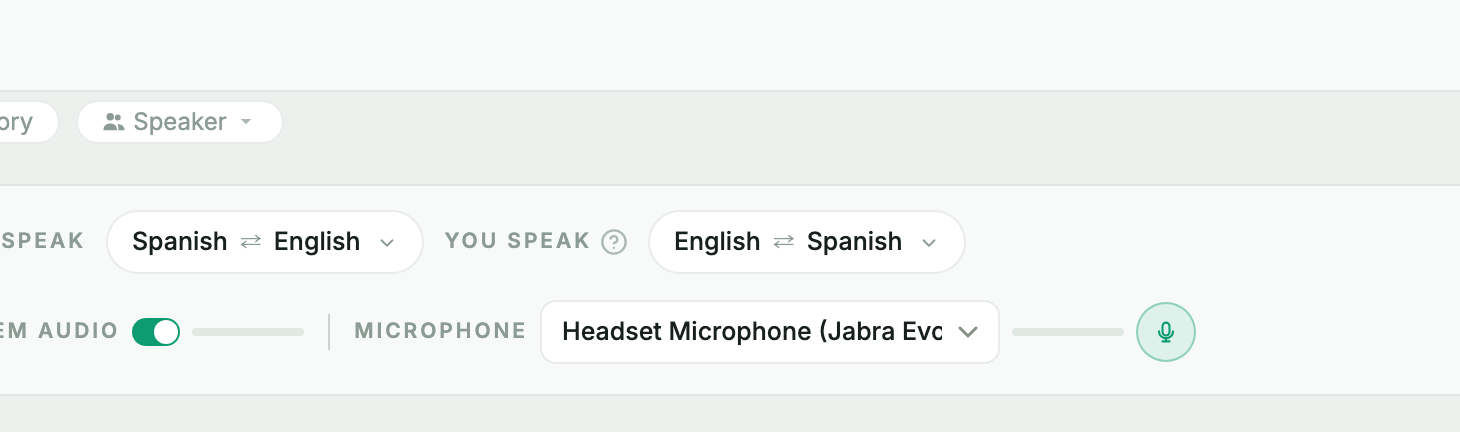
The Microphone dropdown in the MirrorCaption control bar showing a headset microphone

Step 2 — Open Speak translations and choose Virtual microphone

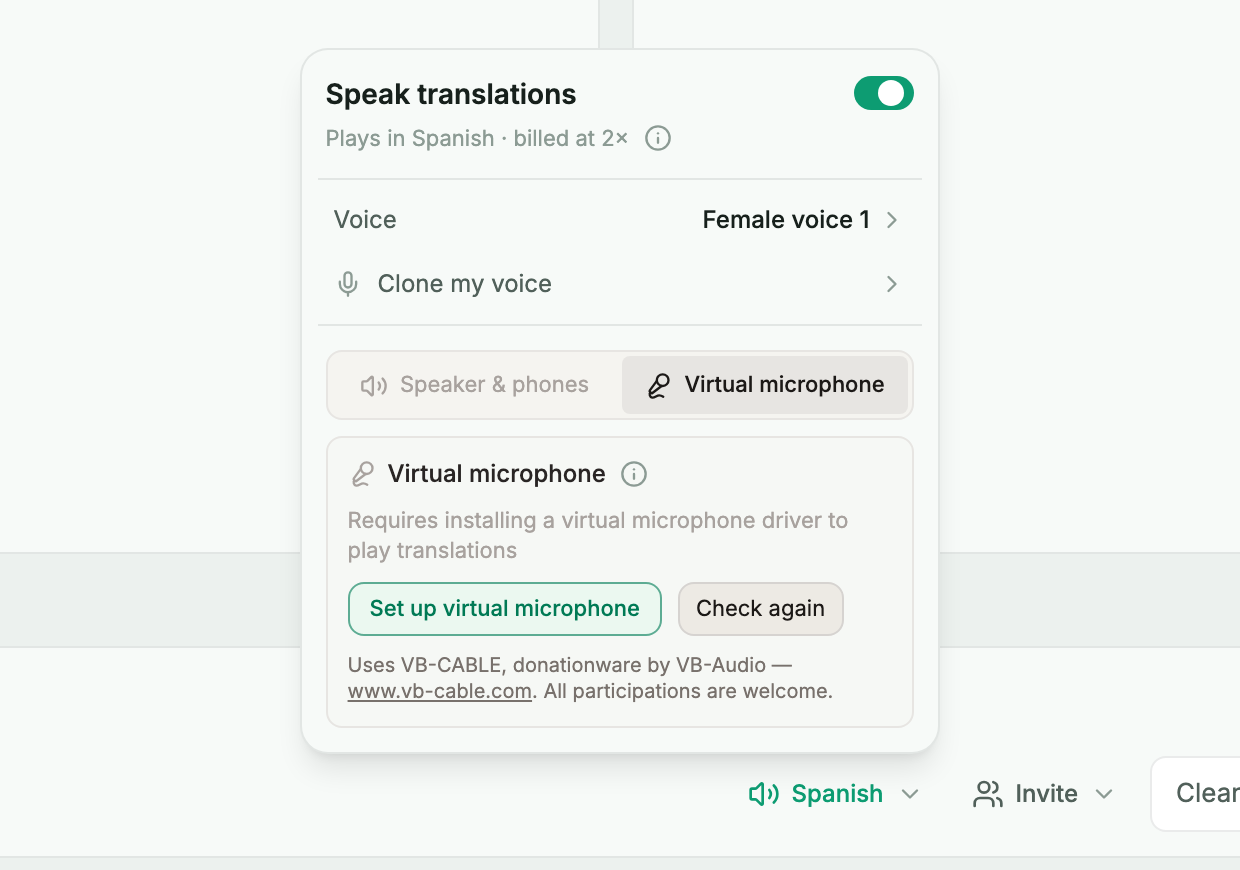
Before you start the session, click Speak translations in the control bar and turn it on. In the panel that opens, switch to the Virtual microphone tab.
🗣️
Only your own speech is read aloud. What the other participants say is shown as captions and is never spoken back to them.
The Speak translations panel on the Virtual microphone tab, with the Set up virtual microphone button

Step 3 — Click Set up virtual microphone

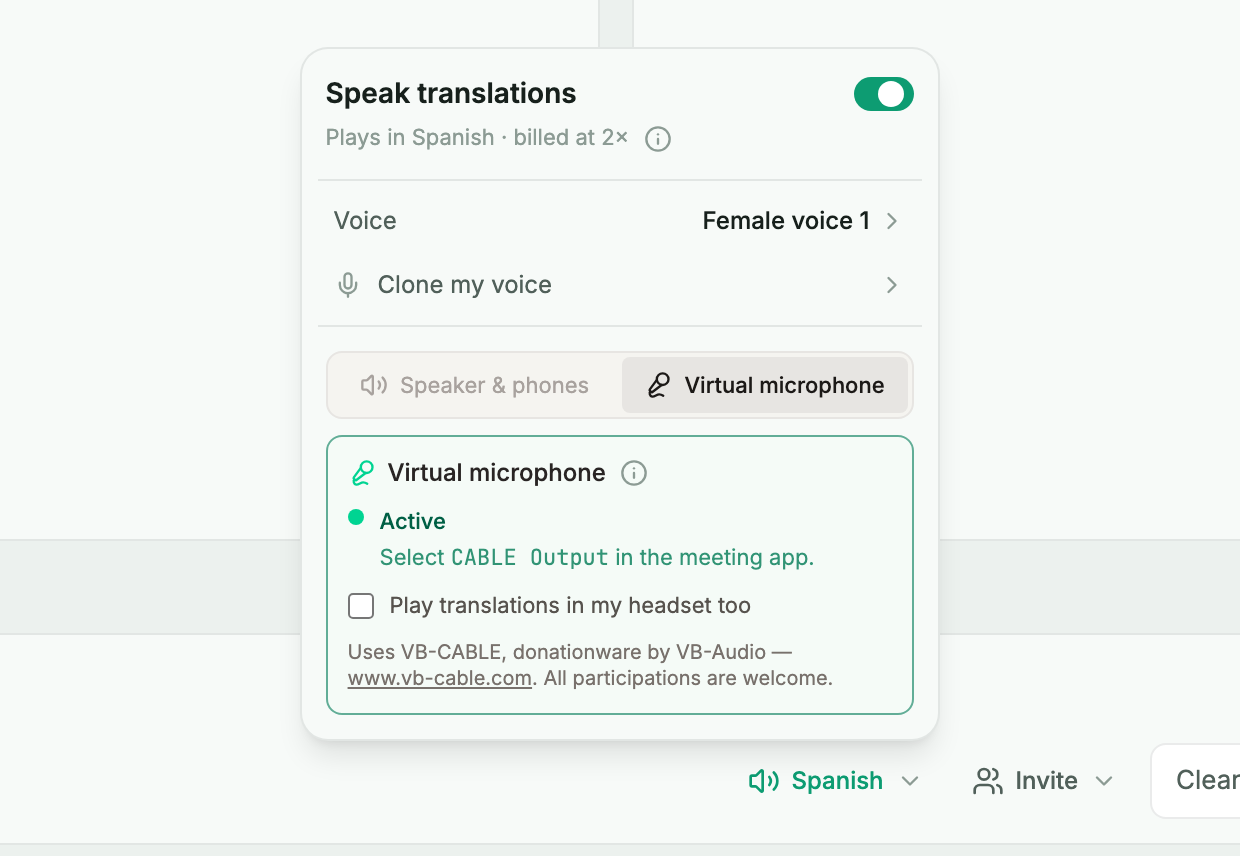
Click Set up virtual microphone and allow the installation when Windows asks. MirrorCaption installs the VB-CABLE audio driver for you. When it is done the card turns green and reads Active. You only do this once per computer.
🔄
If the card does not turn green, click Check again. If it still does not, restart your computer and open the panel again.
The Virtual microphone card reading Active, with the hint to select CABLE Output in the meeting app

Step 4 — Check both Windows defaults

⚠️
Installing a new audio device can make Windows switch to it. Look at the Microphone dropdown in MirrorCaption again and make sure it still shows your real microphone, not CABLE Output. Then play any sound: if your computer has gone quiet, click the speaker icon in the Windows taskbar and set the output back from CABLE Input to your speakers or headset.

Step 5 — Pick CABLE Output as the microphone in your meeting

Join the call and open its microphone menu. In Zoom and Teams it is the small arrow next to the microphone button; in Google Meet it is under Settings, then Audio. Choose CABLE Output (VB-Audio Virtual Cable). Leave the speaker setting as it is.

Step 6 — Start and speak

Press Start in MirrorCaption and talk normally. After each sentence the meeting hears it in the other language. Your own speakers stay silent; tick Play translations in my headset too if you want to hear what is being said for you.

⏱️
The voice speaks a sentence once it is finished, so it follows you by a moment. Pause briefly between sentences and let it catch up.

After the call

When the meeting is over, check where your computer plays sound. Click the speaker icon in the Windows taskbar and look at the output device: if it reads CABLE Input (VB-Audio Virtual Cable), music, videos and your next call will be silent, because the sound is going into the virtual cable instead of your ears. Pick your speakers or headset again.

🔈
Windows sometimes moves the output to the virtual cable on its own, during setup or after a call. Nothing is broken; switch it back whenever you notice it.

Good to know

  • Speaking in your own voice again: switch the meeting microphone back from CABLE Output to your real microphone.
  • Usage: while Speak translations is on, session time counts at a higher rate. The panel shows the rate before you turn it on.
  • Changing your mind mid-call: turning Speak translations on or off applies to the next session, so stop and start again.
  • The driver: the virtual microphone uses VB-CABLE, donationware by VB-Audio (www.vb-cable.com).

If something is off

  • The meeting hears nothing: check that the meeting microphone is CABLE Output, that the card reads Active, and that you are not muted in the meeting.
  • The meeting hears your own voice: the meeting is still on your real microphone. Switch it to CABLE Output.
  • MirrorCaption shows no captions when you speak: its Microphone dropdown has moved to CABLE Output. Pick your real microphone again.
  • Your computer is silent after a call: the Windows output device is still CABLE Input. Click the speaker icon in the taskbar and pick your speakers or headset.
  • No Set up button: you are on an older version. Install the latest desktop app from Downloads.
✉️
Still stuck? Email info@mirrorcaption.com or see Troubleshooting.