← Help Center

Float live translated captions over your OBS stream

Speak your own language while viewers read the translation on top of your gameplay. The captions go into OBS as an ordinary window source, with no plugin and no chroma key.

💻
This guide is for the MirrorCaption desktop app on Mac, version 1.0.17 or later — get it from Downloads. The Windows app has the Subtitles style from version 1.0.18, but these OBS steps were tested on Mac only. It adds captions only: your viewers still hear your own voice.
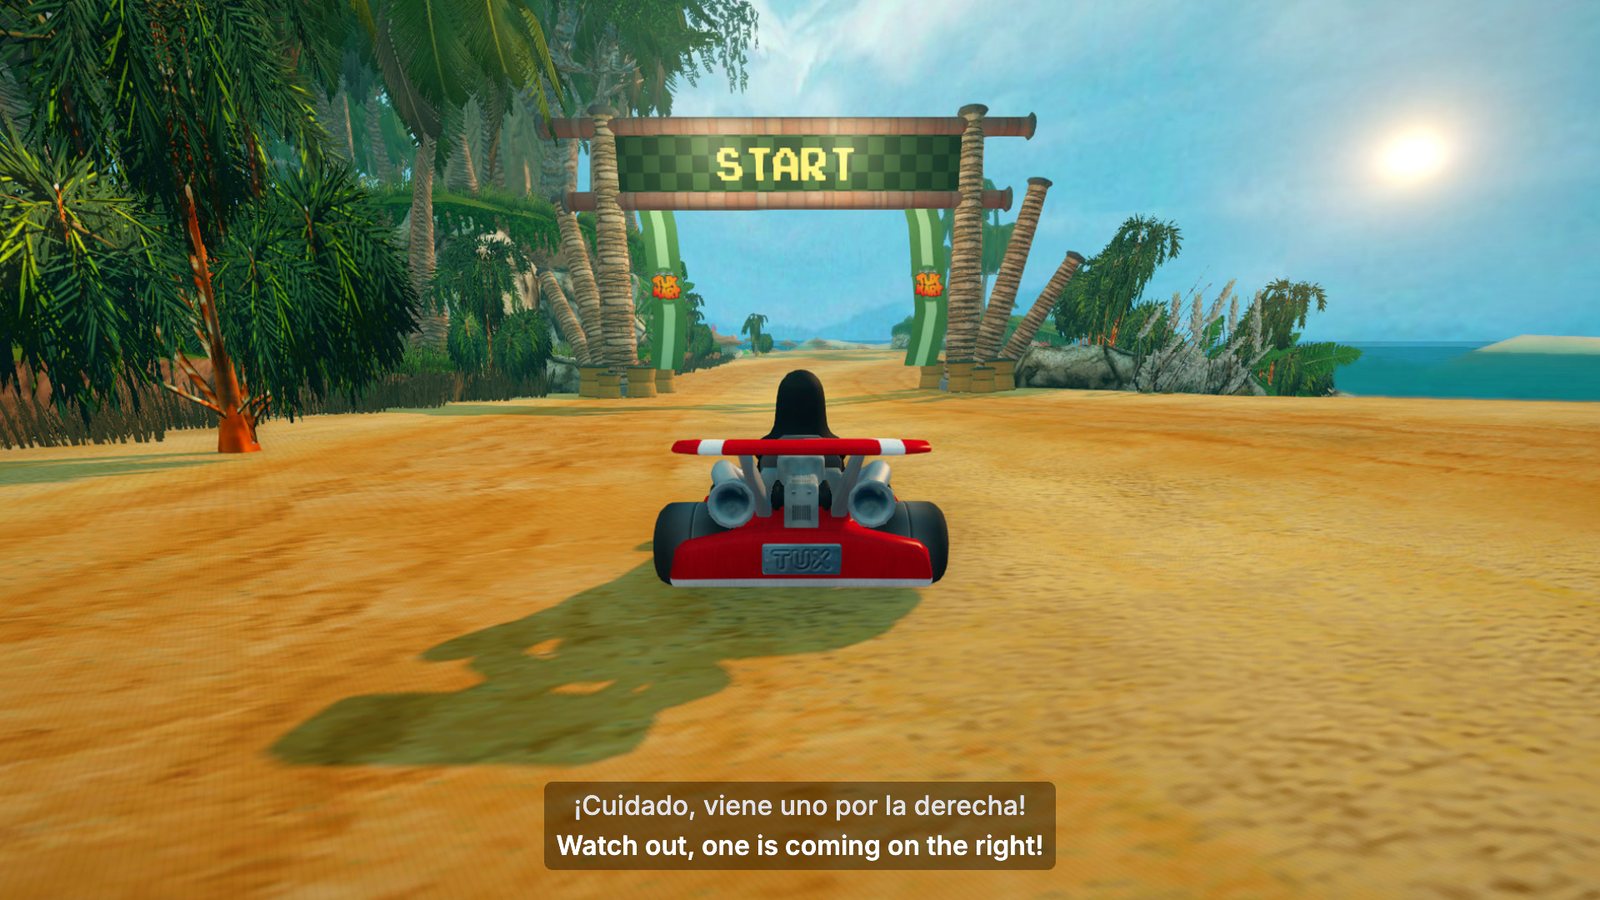
A racing game in OBS with Spanish and English captions over the bottom of the picture and the game showing through

Pick a caption style

MirrorCaption has two floating windows, and OBS can capture either one. Subtitles suits most streams, because only the words sit on top of the game.

FeatureSubtitles (transparent)Float (opaque)
Viewers seeThe latest lines, centered, with the game showing throughA panel of recent lines with a live highlight
StylingText size, six colors, dimmed or no background, original above, below or offFive text sizes; follows the app theme
OBS setupNothing extra: the background is already transparentCrop off the left rail and top strip
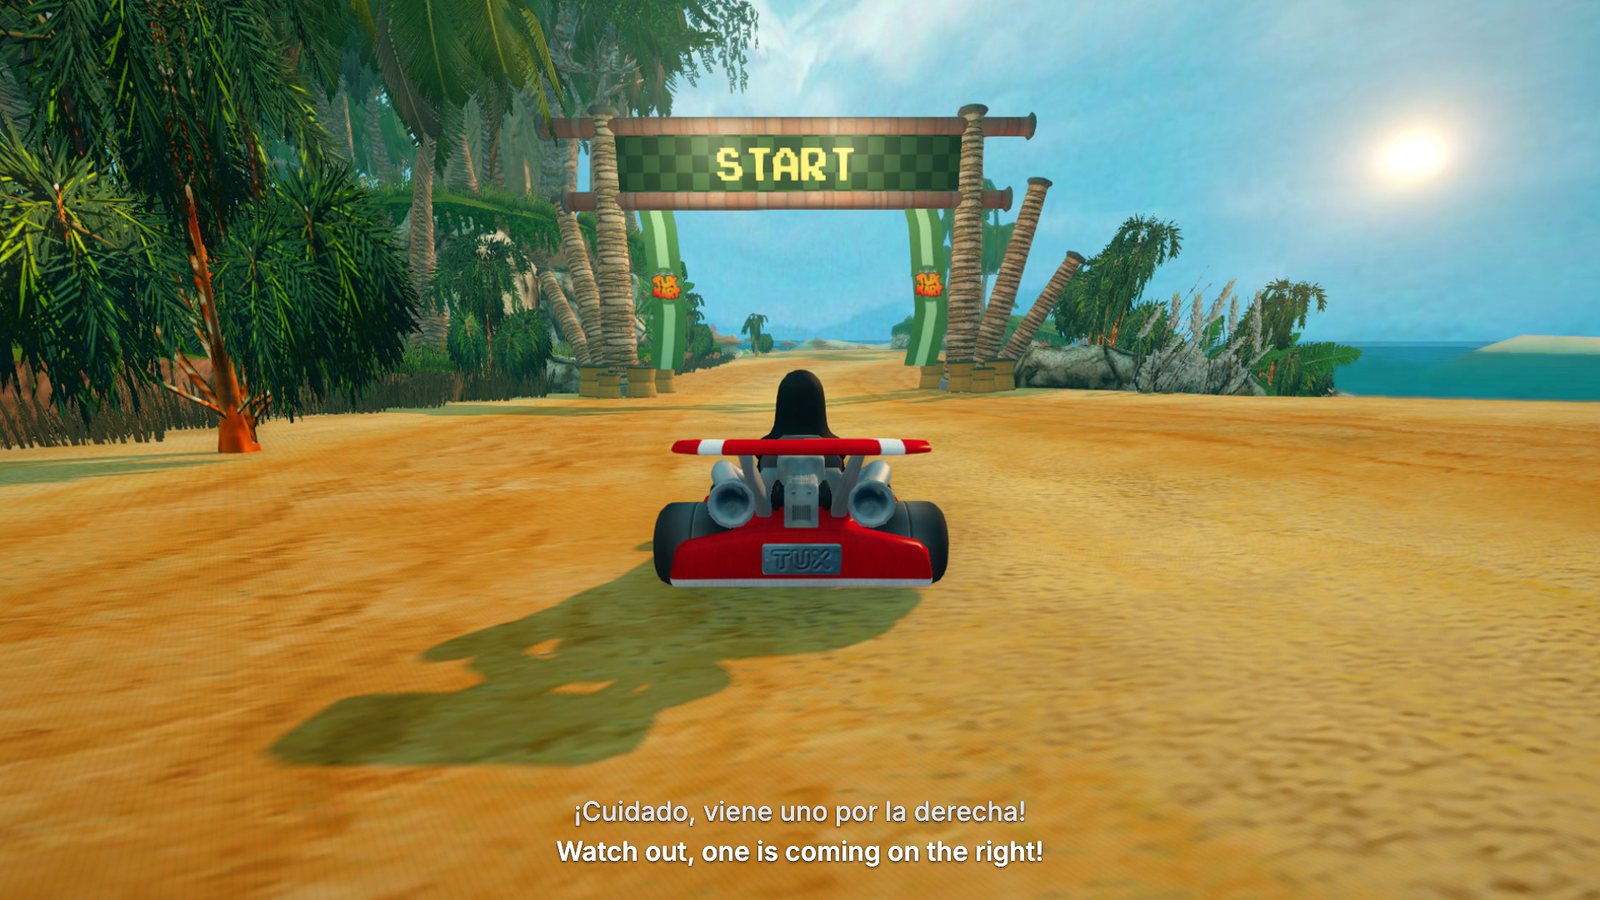
White outlined captions with no background plate over the game
Subtitles with Background set to None: only outlined text remains.
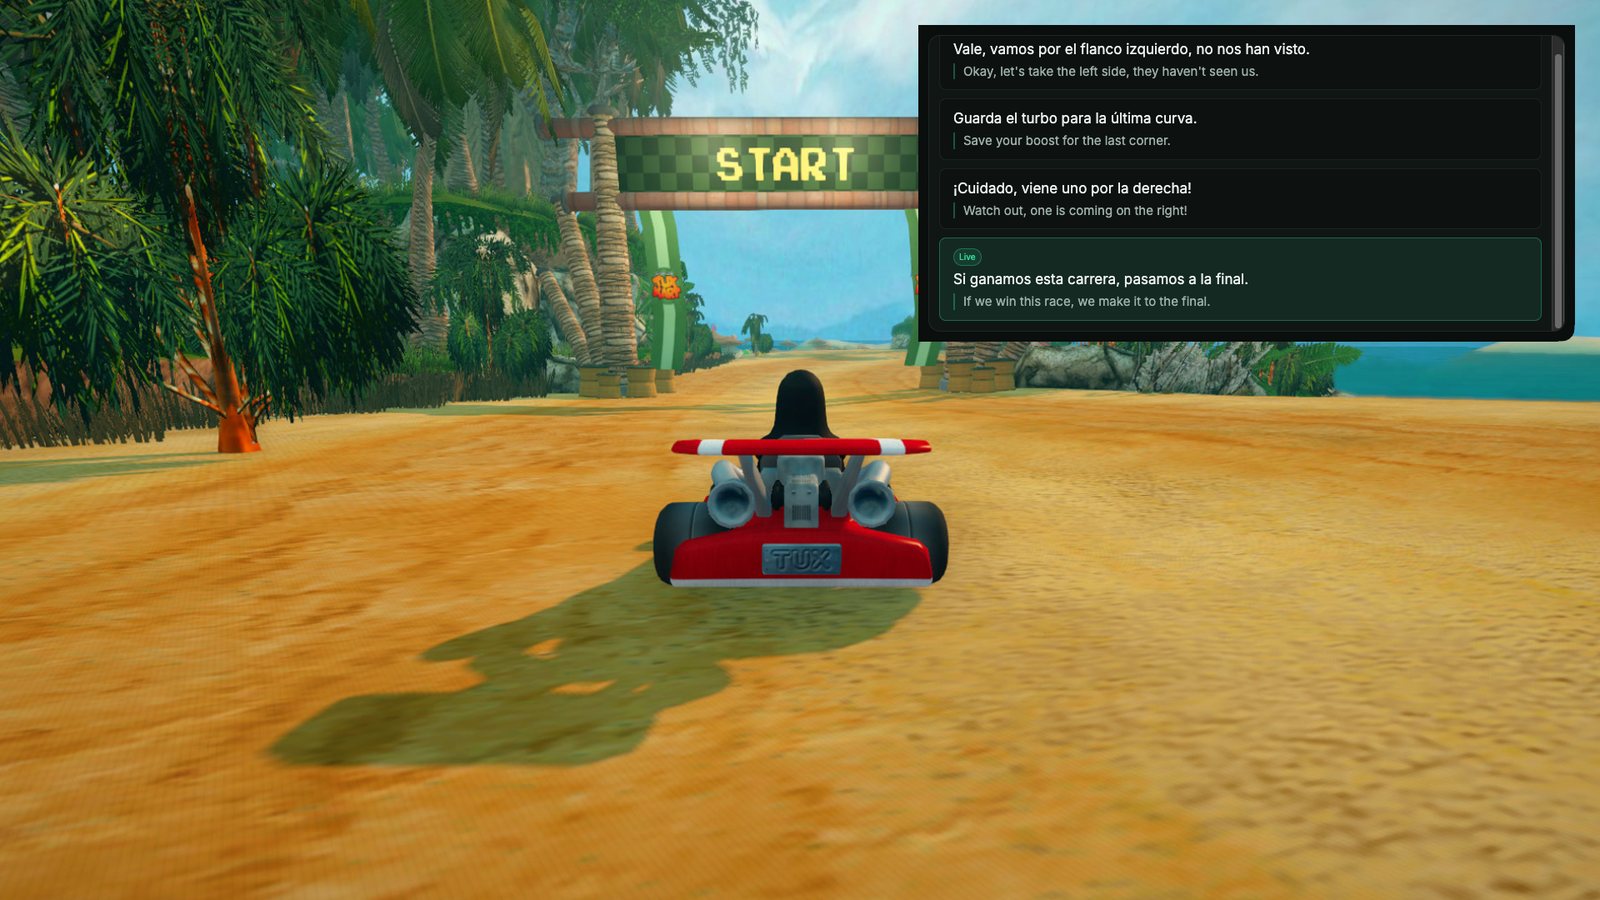
The dark Float panel cropped and placed in the top right corner of the game
Float in a corner of the scene, so viewers can catch up on earlier lines.

Set it up

Step 1 — Start captions in MirrorCaption

Under You speak, choose the language you talk in and the language viewers should read (1). Turn System Audio off so game sound and in-game voices are not captioned (2). Click Start transcription (3).

The MirrorCaption control bar with You speak, System audio off, Start transcription and Float marked 1 to 4

Step 2 — Open the floating window

Click Float in the control bar (4 above). For transparent captions, click Subtitles in the left rail of the window that opens. To go back, hover over the captions and click Panel. MirrorCaption opens the style you used last.
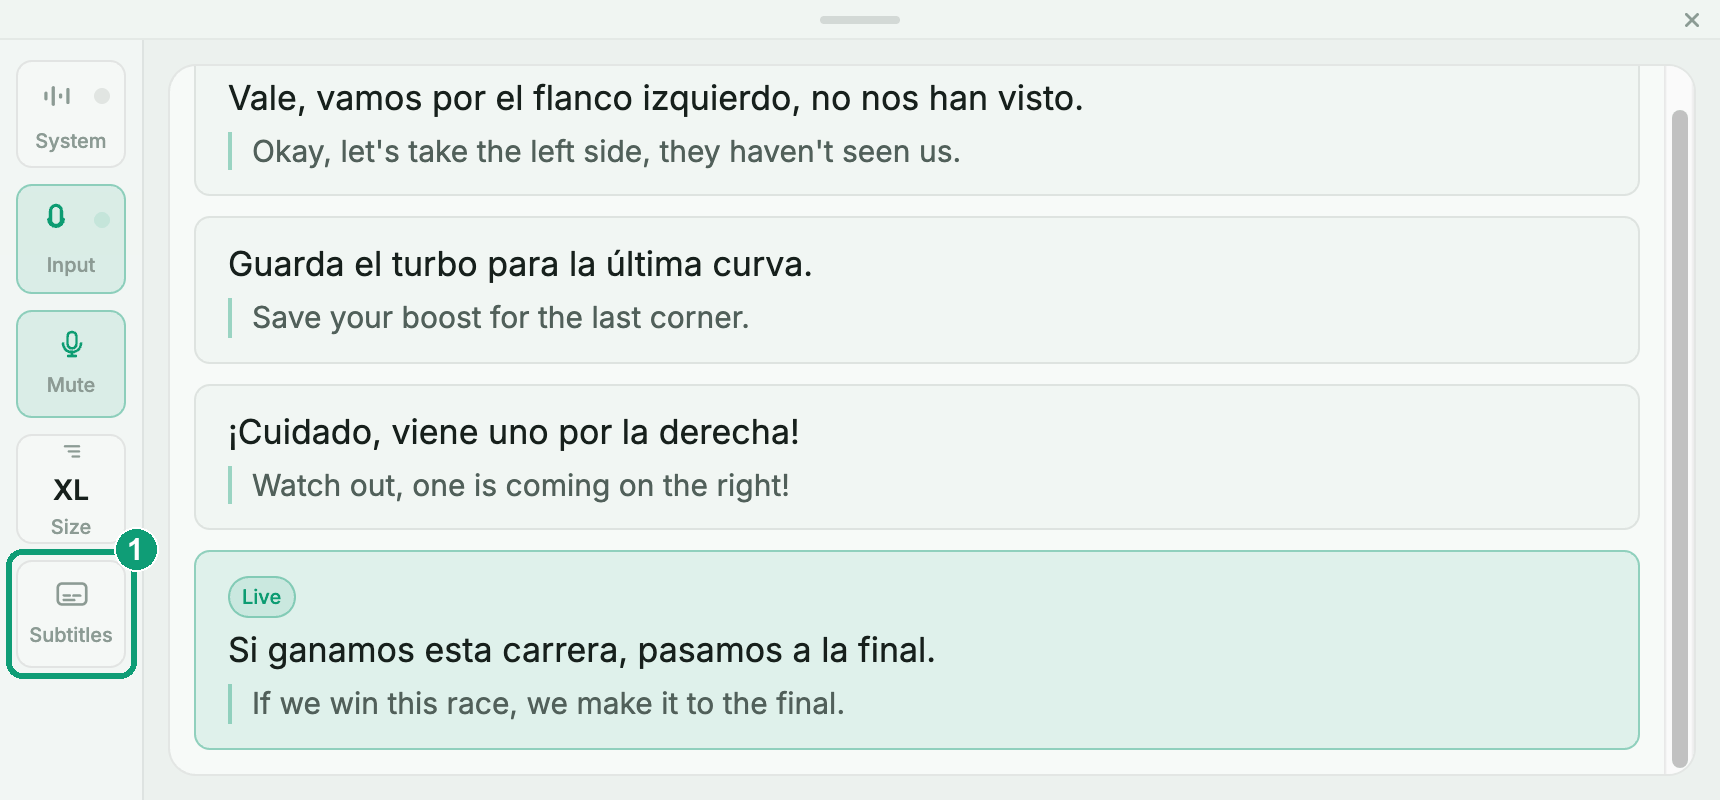
The Float window with recent captions and the Subtitles button in its left rail marked

Step 3 — Style the captions before you go live

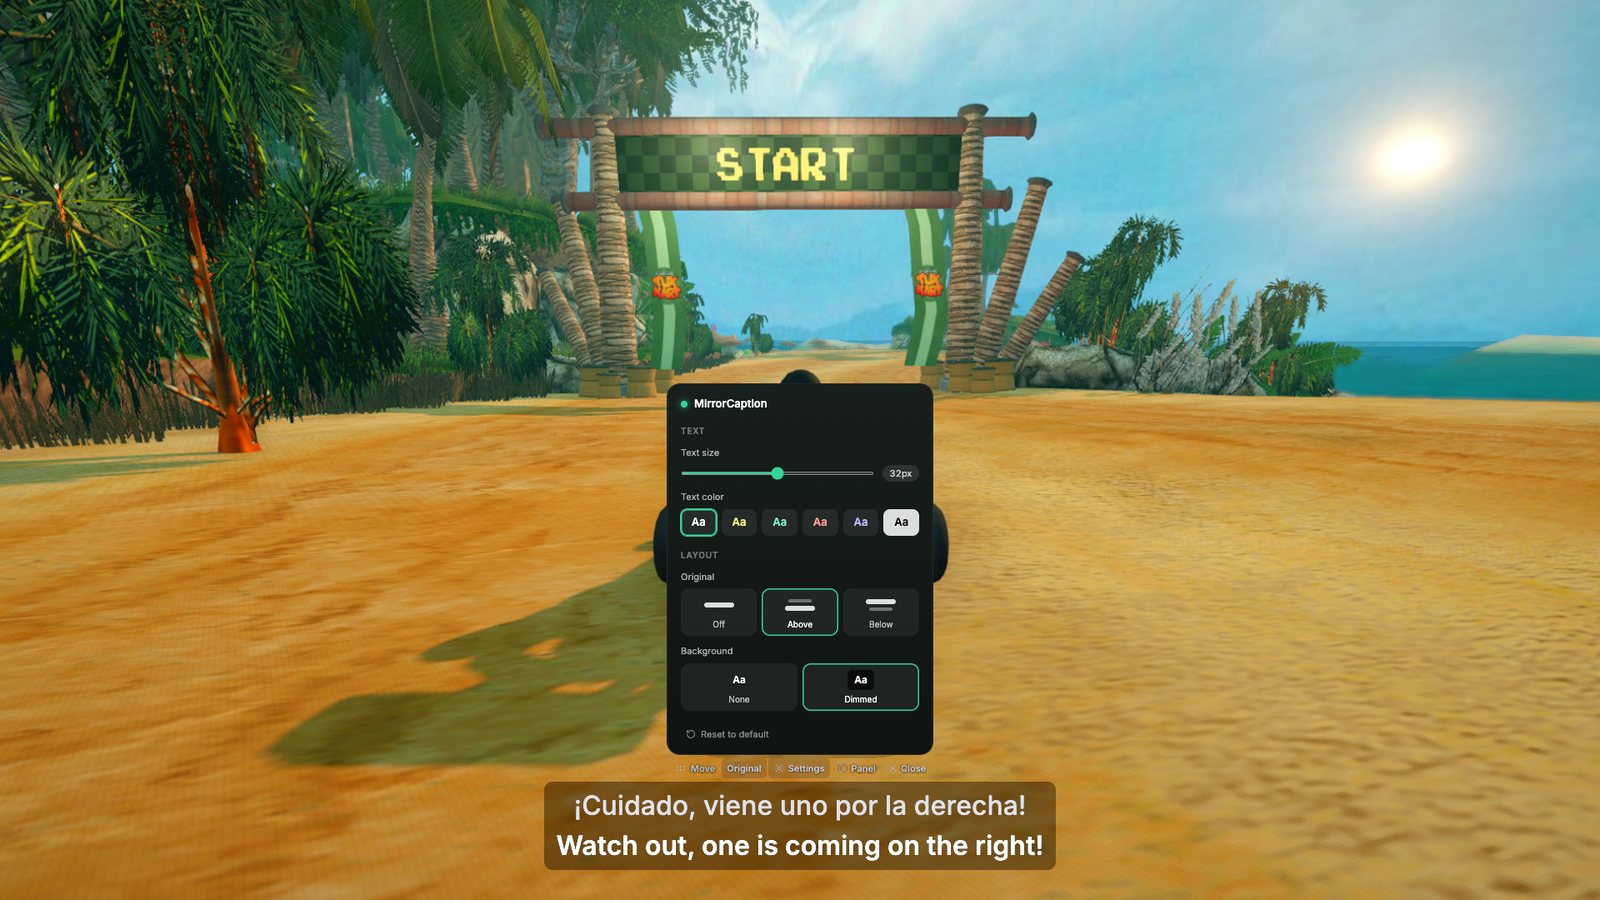
Hover over the captions and click Settings to set the text size, color, background and whether the original line shows. Then close the panel and move your mouse away.
👀
OBS captures everything in this window, including the settings panel and the toolbar that appears on hover. Viewers would see them too, so finish styling before you start streaming.
The caption settings panel with text size, color, original and background, captured in OBS above the captions

Step 4 — Add your game to OBS

In the Sources panel, click + and choose macOS Screen Capture. Set Method to Window Capture and pick your game window. If a full-screen game is not listed, tick Show fullscreen and hidden windows / applications.

Step 5 — Add the captions as a second source

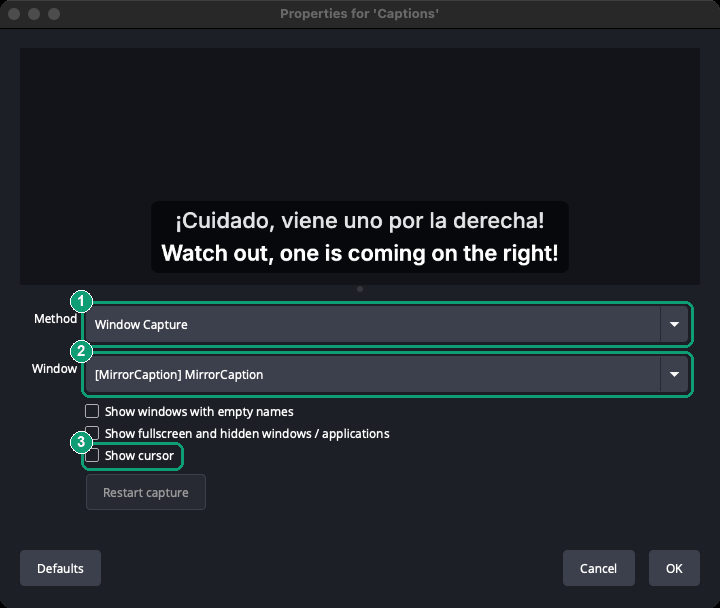
Add another macOS Screen Capture and name it Captions. Set Method to Window Capture (1) and Window to [MirrorCaption] MirrorCaption (2). Untick Show cursor (3).
🪟
The list shows two entries with that exact name: the main app and the floating window. Pick the one whose preview shows your captions. A black background in this preview is normal; it is transparent in your scene.
The OBS properties dialog with Method set to Window Capture, Window set to MirrorCaption and Show cursor unticked

Step 6 — Check the order and mute the captions source

You added both sources with + (1). Keep Captions (2) above Game (3) in the list, or the game will cover it. In the Audio Mixer, mute Captions (4): the window capture adds an audio channel you do not need.
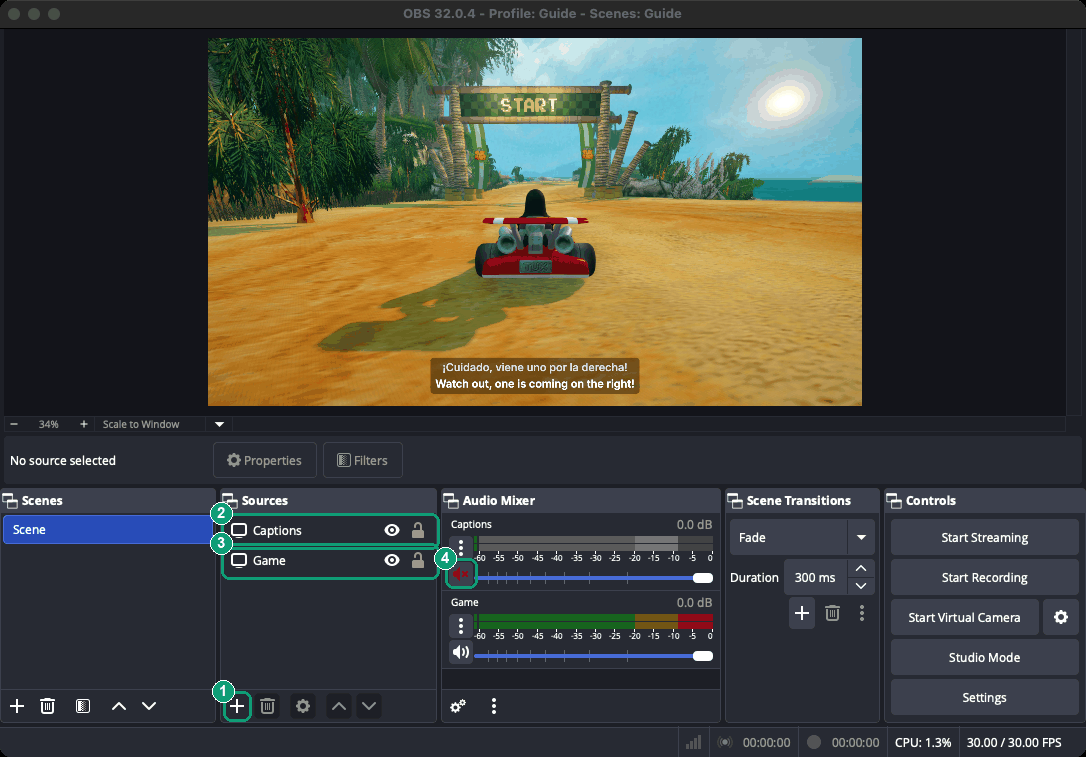
OBS with Captions above Game in Sources and the Captions source muted in the Audio Mixer

Step 7 — Position the captions

Drag Captions to a clear part of the scene, away from the minimap, scores and health bars. Moving the window on your own screen does not move it in OBS.

  • Subtitles: the window changes height with the text. Right-click the source, choose Transform, then Edit Transform, and set Positional Alignment to Bottom Center so the bottom line stays put.
  • Float: hold Option and drag the left and top handles of the source to crop off the rail and the drag strip.

Step 8 — Make a short test recording

Click Start Recording in OBS and talk for 30 seconds. Play it back and check that the captions keep updating, stay readable and cover nothing important.

If something is off

  • The captions froze or turned into a white box: switching between Float and Subtitles, or closing and reopening the window, creates a new window that OBS is not following. A frozen caption can look fine at a glance, so recheck after any switch. Open the source properties and pick the window again.
  • OBS shows the whole MirrorCaption app: you picked the main window. Open the source properties and choose the other entry with the same name.
  • MirrorCaption is not in the Window list: open the floating window first, then look again.
  • It says Listening…: that is the placeholder until you speak. Viewers see it too.
  • A toolbar appears on stream: your mouse is over the captions window. Move it away.
  • No Subtitles button: you are on an older version. Install the latest desktop app from Downloads.
✉️
Still stuck? Email info@mirrorcaption.com or see Troubleshooting.

Screenshots: MirrorCaption 1.0.17 and OBS 32.0.4 on macOS, with sample caption text. Game: SuperTuxKart by the STK dev team, CC BY 3.0; scaled, with captions added.